 Object Properties
Flamingo nXt object properties only affect the way objects are rendered in Flamingo nXt.
 Material Source
A material can be assigned to layers, blocks, and objects. For details on Assigning material see the Material Assignments topic. If the material is set to ByObject, then the material properties are also displayed in this dialog. For more details on editing a material, see Material Properties.
 Texture mapping
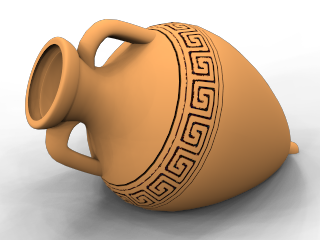
Mapping controls how a material is located (mapped) on a particular object. The method used to assign a material whether to a layer or object does not affect mapping. For materials that have no noticeable pattern, it is normally not necessary to control the mapping. Use mapping where the material is directional or has an obvious pattern. Even in these cases, the default mapping may be adequate. Mapping remains with the object and follows it if it is moved, rotated, or scaled. For details on the mapping types see the Texture Mapping topic.
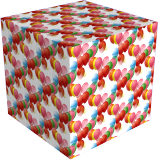
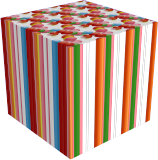 Two different mapping directions
 Decals
Decals are non-tiling image maps that apply directly to objects instead of indirectly using a material. Use decals to modify a limited part of an object’s color, reflectivity, or bumps. See the Rhino Decals for details on creating and placing decals.
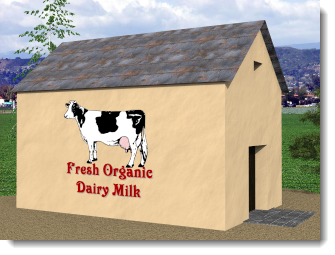
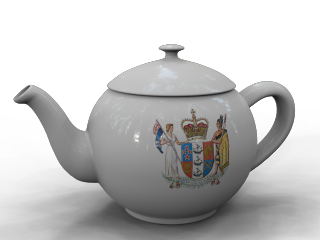
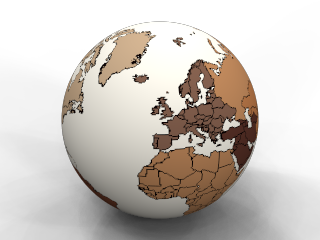 Four different decal examples
 Custom Meshes
Several custom mesh modifiers can be used in Rhino to detail rendered models. Use these modifiers to round edges, add panel shut lines, and create cables from curves.
For more details go to the topics below:
 Flamingo Properties
Alpha channel
Makes the object invisible. Shadows cast by and on the object are rendered. The image can then be overlaid on another image and the shadows will show in the composite image.
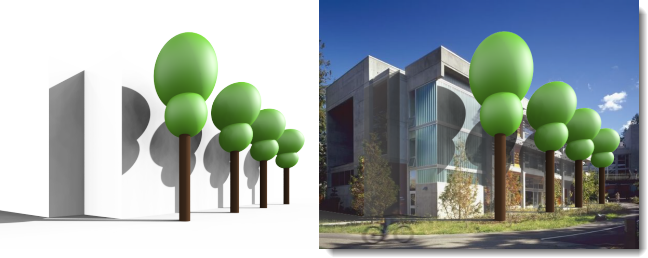 In the example above, a few simple planar surfaces that match the image were created to catch shadows cast on the building by the trees. The planes were tagged with the Alpha channel property so when they were rendered, they were invisible, but still displayed the shadows. This partially transparent image was then overlaid onto the image.
Caustics
The light rays reflected or refracted by a curved object or the projection of those rays on another surface. Caustics should be used in very specific situations. Caustics are only rendered with the Path Tracer engine or the Hybrid render engine. Caustic calculations take many passes to converge. See Wikipedia article: Caustic (optics) for more information.
 Caustics produced by a glass of water.
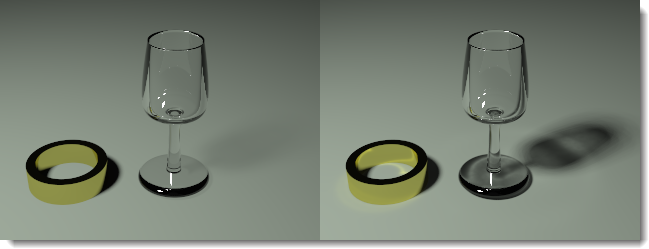 Without caustics (left), and with caustics (right).
Thin
A space-enclosing, transparent object is normally treated as a solid for transparent refraction. Setting the Thin property means that each surface will be treated as a two-sided object for refraction. This is the setting to use if single surfaces such as glass are used for architectural models.

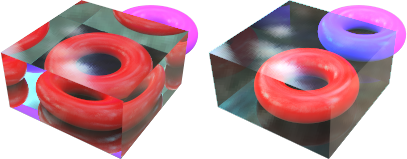 Base Rhino model (left), Normal (middle) and Thin (right).
Daylight portal
A daylight portal is an opening for Sun and Sky lighting for an interior rendering. A Daylight portal pulls sun, sky, and ground light into an interior space in a natural way. Daylight portals only have an effect when the Sun is turned on. When the lighting scheme is set to Interior daylight, all transparent surfaces act as daylight portals automatically. It is only when the lighting scheme is set to Studio or Exterior daylight and you still want to bring outside sun and sky light into an interior space that you must manually tag the windows as daylight portals.
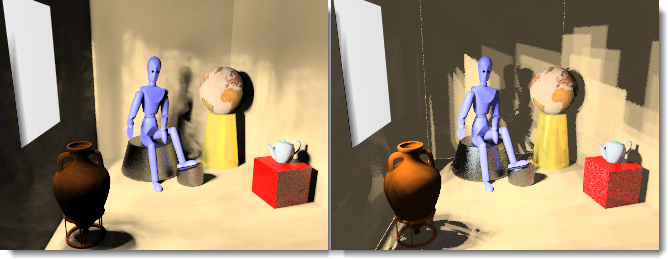 With daylight portal (left), without daylight portal (right).