 Basic Material Properties
Flamingo materials are defined by a series of property groups. These are a series of Simple Material Types of commonly used materials. These materials present a very simple set of controls. This gives easy access to the properties you can change to make a material look different without the complexity of extra controls. For most simple materials, changing the color is all that is needed to get a different look.
Simple Material Types:
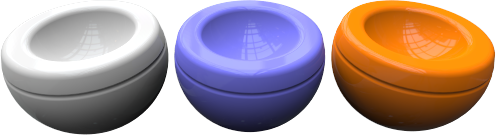
Solid Color
Plastic
Metal
Glass
Glossy
ClearFinish
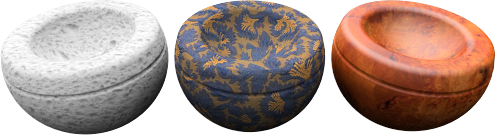
Flamingo Textured
Texture Set
Any material can be converted to an advanced material. Advanced materials present all the possible controls to edit a material in Flamingo nXt. For the most extensive control of a material, use Advanced Materials or convert your existing material to an advanced material.
Advanced Materials are comprised of these property groups:
Name Material Procedure Advanced Material Properties Reflective Finish Transparency Properties Procedural Textures Bitmap Textures Notes
Materials are saved and stored in the Rhino model. Unique materials can have the same name in different Rhino models.
Solid Color
Solid Color materials have only a name and a color.
Name
This is the name of the material. See the Advanced Name property for details.
Color
Use the Color Selector to set the main color. See the Color Selector  topic for details.
Advanced Editor
Opens the Advanced Material Properties dialog box for more control over this material.
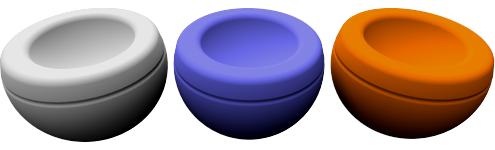
Plastic
Plastic materials are slightly reflective with a white highlight.
Name
This is the name of the material. See the Advanced Name property for details.
Color
Use the Color Selector to set the main color. See the Color Selector topic for details.
Advanced Editor
Opens the Advanced Material Properties dialog box for more control over this material. Use the Advanced Editor to overwrite the presets of Highlight color, Intensity, Fresnel, and Sharpness.
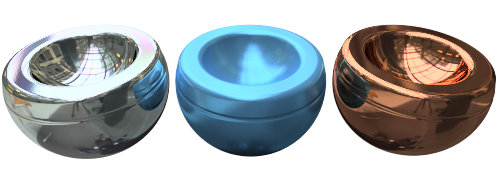
Metal
Metal materials have a highlight whose color matches the color. You can also control the Sharpness of the reflection.
Name
This is the name of the material. See the Advanced Name property for details.
Color
Use the Color Selector to set the main color. See the Color Selector topic for details.
Sharpness
Controls the sharpness vs blurriness of the reflection. See Advanced Sharpness topic for more details.
Advanced Editor
Opens the Advanced Material Properties dialog box for more control over this material. Use the Advanced Editor to overwrite the pre-sets of Highlight color, Intensity, Fresnel and Type.
Glass
Glass materials have a color and an Index of Refraction (IOR).

Name
This is the name of the material. See the Advanced Name property for details.
Color
Use the Color Selector to set the main color. See the Color Selector topic for details.
Index of Refraction
Controls the amount light bends through the material. See Advanced Index of Refraction topic for more details.
Advanced Editor
Opens the Advanced Material Properties dialog box for more control over this material. Use the Advanced Editor to overwrite the pre-sets of Highlight color, Intensity, Fresnel, Sharpness and Transparency.
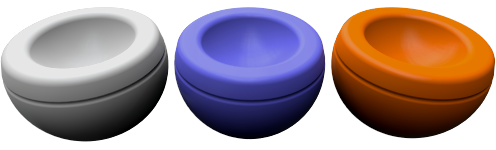
Glossy
Glossy materials generally have a low Highlight Intensity and Sharpness.
Name
This is the name of the material. See the Advanced Name property for details.
Color
Use the Color Selector to set the main color. See the Color Selector topic for details.
Intensity
Controls strength of the highlight from lights on the surface. See Advanced Intensity topic for more details.
Highlight Sharpness
Controls sharpness vs blurriness of the highlight spot from lights on the surface. See Advanced Highlight sharpness topic for more details.
Advanced Editor
Opens the Advanced Material Properties dialog box for more control over this material. Use the Advanced Editor to overwrite the presets of Fresnel and Type.
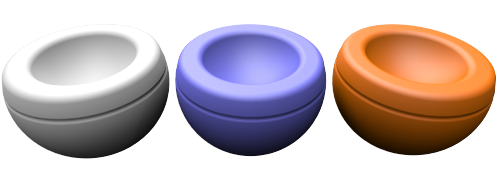
ClearFinish
The ClearFinish material simulates car paint, porcelain, ceramics, varnished woods, or any material with a plastic or clear-coat layer. ClearFinish uses the Fresnel setting to change the material color based on angle to the view. These materials tend to be a deep color when looked at straight on, but as the surface curves away from the view, they become more and more reflective. Car paints with a clear-coat or clear lacquer finishes are good examples.
Name
This is the name of the material. See the Advanced Name property for details.
Color
Use the Color Selector to set the main color. See the Color Selector topic for details.
Advanced Editor
Opens the Advanced Material Properties dialog box for more control over this material. Use the Advanced Editor to overwrite the presets of Highlight color, Intensity, Fresnel and Sharpness.
Flamingo Textured
Textured materials use images to create colors and patterns. The image name, resolution, tile size, and highlight intensity and sharpness are controllable from this simple material.
Name
This is the name of the material. See the Advanced Name property for details.
Color
Use the Color Selector to set the main color. See the Color Selector topic for details.
Intensity
Controls strength of the mirror-like reflection of the surface. See Advanced Intensity topic for more details.
Sharpness
Controls the sharpness vs blurriness of the reflection. See Advanced Sharpness topic for more details.
Image
Set the image map and properties of the material. There are many options here. See the Advanced Images topic for more details.
To add a new image:
- Click on the (empty - Click to assign) text and then select an image in the file dialog.
- Or, click the Edit Image
 button and select an image in the file dialog.
To edit how an image effects a surface:
- Click on the name of the image in the list. This will present the Image Properties Dialog. To get back to the main material, click on the material name in the Material Editor
To replace an image with a different image:
- Click the Edit Image button and select an image in the file dialog.
Advanced Editor
Opens the Advanced Material Properties dialog box for more control over this material. Use the Advanced Editor to overwrite the presets on this material.
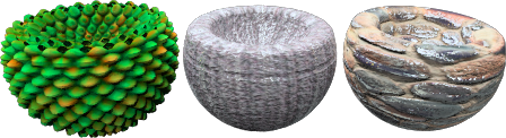
Texture Set
Texture set materials are a coordinated set of texture which defines a material. These coordinated sets can the created through texture maps that contain information such as displacement, normal, or bump maps. Displacement maps give the material depth. Combining these texture maps as a set can create very realistic materials. The PixPlant software is a product that can take a standard bitmap and create these sets of textures.
Name
This is the name of the material. See the Advanced Name property for details.
Width and Height
Controls size of all the textures in the set. Use this control to keep all the bitmaps sized and aligned together.
Intensity
Controls strength of the mirror-like reflection of the surface. See Advanced Intensity topic for more details.
Sharpness
Controls the sharpness vs blurriness of the reflection. See Advanced Sharpness topic for more details.
Types
This controls the type of reflection on the surface. See Advanced Type topic for more details.
Texture maps
Within the Texture Map table will be listed the textures that are part of the texture set. Right-click on the table to add, remove or change the textures in the set.
Add Maps…
Use this command in the right-click menu to add new textures to the list. More then one texture can be added at one time. If the textures names include suffixes for one of the mapping types, then the map type will be automatically added. For instance, if a map has -normal in the name it will automatically be tagged as a normal map type.
Remove Map
This right-click command will remove a texture map from the table.
Color
This right-click mapping type will contribute the the visible color of the texture. For more details see Standard Mapping Type
Bump
The bump map will use the greyscale of the texture to simulate a change in height or bump in the material. For more details see Bump Map Advanced
Normal
Normal maps are special bump maps that use the red, green and blue channel of the bitmap to adjust the bump direction at each pixels. Because the blue channel is the the Z direction of the bump, the images tend to take on a blue hue. For more details see Normal Map Advanced
Specular
A Specular map will use the greyscaled colors in the material to control the amount of reflection in the image at that spot. For more details see Transparency Map Advanced
Opacity
An opacity map will control the transparency of a material at each pixel based on the greyscale of the image. For more details see Normal Map Advanced
Displacement
A displacement map will actually displace the rendering mesh based on the greyscale color of the map. For more details see Displacement Map Advanced
Advanced Material
The Flamingo Advanced material contains a complete set of properties for a Flamingo Material. If none of these simple materials work, use the Flamingo Advanced Material to create a material and have the greatest flexibility in creating materials.