 Lights
Artificial light sources use normal Rhino lights with added Flamingo properties to control the light distribution. When using light sources, choose the type that most closely represents the real-world lamp being modeled.
Lights Tab
The Lights tab will list all the artificial lights in the scene. This topic covers the Flamingo specific Lights tab. There is also a Rhino Lights Tab. Flamingo and Rhino will keep the lights settings in sync between the two tabs. The Flamingo Lights tab is a bit more flexible through additional Light Properties.
The Lights tab must be activated through the Lighting Preset or the Custom Lighting settings.
Where can I find Flamingo Lighting control?
If Lights tab is activated through the Lighting Preset or the Custom Lighting settings then find the lights tab here:
 Toolbars >
 Flamingo nXt Toolbar
 Menus > Flamingo nXt 5.0 Pulldown > Show Control Panel > Flamingo Tab > Lights
From the Lights tab lights you can insert, turn off/on, and change the strength and channel of each light.
Flamingo supports these light types:
Note: Rhino Directional Lights  are not supported. They do not appear in the list of lights and cannot carry Flamingo nXt properties.
Some light properties are displayed on the Lights tab table for quick editing of common properties.
Properties contained in the table are:
Right-click on the Lights tab table to open the Additional Options menu.
Access Light Properties by picking on the light and accessing the Light Properties icon  on the Object Properties Panel.
Light Types
Lights can be inserted from the Rhino toolbars or the Flamingo Lights tab. Objects can be tagged as lights with Flamingo.
 Tag objects as lights
Any renderable object (surface, solid, etc.) can be tagged as a light source and given light properties. Additional properties such as distribution, direction, and strength can be assigned. Objects tagged as lights may display a preview widget showing direction of the light and its center location.
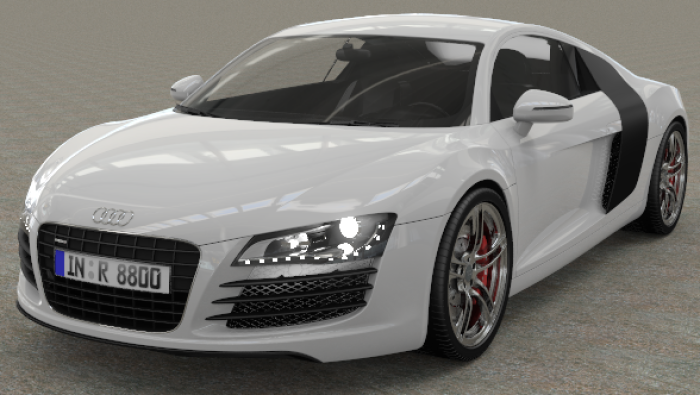 LED driving lights and headlights tagged as light sources
 Spotlight
Spotlight is a conical light distribution with a specific direction. The light properties include a source radius, beam angle, falloff radius, and direction. The larger the source radius, the softer the shadows will be from the light. By default there is a visible disk at the light location. Information on editing the location, direction, and beam angle on the screen using grips can be found in the Rhinoceros Spotlight help topic.
 A Spotlight pointed at the red box
 Point Light
Point lights are a small sphere that distributes light equally in all directions. Light properties for this light include source radius. The larger the radius, the softer the shadows it will cast from the light. By default there is a visible light sphere at the light location when rendering. Note that unusual effects can happen if the point light is partially obscured by an object that intersects the light.
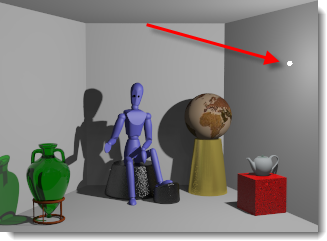 A small point light close to the right wall
 RectangularLight
Provides an approximation of a recessed light with a diffuser or baffles. The light distributes light in a diffuse pattern based on the orientation of the rectangle. A direction arrow is drawn at the center point of the light. Full strength light is directly in front of the rectangle. Then the light falls off at an angle to the objects from the rectangle. By default a white rectangle will be visible when rendering. A common mistake is to insert these rectangles at exactly the same height as a ceiling plane. For consistent results, make sure the lights are slightly below the ceiling. For information on editing the location, direction, and beam angle on the screen using grips can be found in the Rhinoceros RectangularLight help topic.
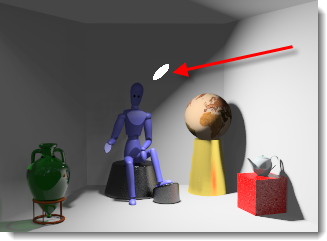
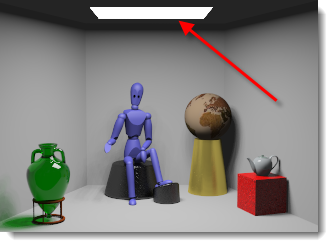 A rectangular light just below the ceiling
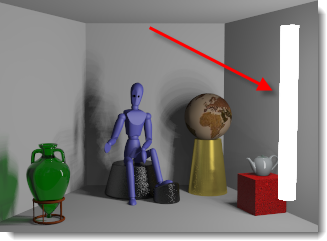
 LinearLight
Distributes light in a cylindrical pattern that imitates a fluorescent tube. Light properties for this light include source radius and length. The larger the radius, the softer the shadows it will cast from the light. By default there is a visible light cylinder at the light location when rendering. Note that unusual effects can happen if the cylindrical light is partially obscured by an object that intersects the light. Use Rhino Control points to activate the grips on the light to edit on the screen.
Light Properties
When Flamingo is the current rendering application in Rhino, additional properties can be set for lights. Lights have some but not all properties in common.
Name
The name of the light object. This is an easy way to differentiate lights which are the same type in the model.
 On/Off
Toggles the light on and off. In the Light table, if the light bulb icon is yellow the light is on. If the light bulb icon is gray the light will be off in the rendering. Double-click on the icon to toggle it On/Off. In the properties dialog, there is an On/Off Checkbox.
Visible
By default lights will show themselves as a bright light source in the rendering. By unchecking the Visible property, the light object itself will be invisible in the rendering. Still, the light will project its light into the scene.
Light distribution (Tagged objects only)
When tagging an object as a light, use Distribution to specify the pattern the light projects into the scene. In the light panel, double-click on the distribution cell to get an options drop-down. Distribution types include: All Directions, Spot and Diffuse. Both Spot and Diffuse require a direction to be specified.
Aim light (Tagged objects only)
For tagged light which have a distribution of Spot or Diffuse, specify a direction. Double-click on the “Aim »” option and follow the command line prompts.
Watts
Specifies the electrical power of the light. It is recommended to start with realistic values for the scene. In the light table, double-click on the cell to change the value.
Beam angle (Spotlights only)
The angle in degrees controlling the width that light emanates from a light source. This also can be changed by using grips on the screen. Find details on grip editing in the Rhinoceros Spotlight help topic.
Radius
The size of the visible light source. Smaller lights cast sharper shadows.
Color
The color for the light the source emanates.
Use material color (Tagged objects only)
Uses the color of the material assigned to the light object for the light it produces.
Channel
Lights can be assigned to one of eight channels. This feature lets you adjust the lighting in your rendered image in real time, after the rendering has been produced. This is a very powerful feature when working to balance multiple light sources in a rendering. For more details see the Rendering Channels topic.
IES File
IES (Illuminating Engineering Society) files are photometry files that define the distribution of light from a light source. Light fixture manufacturers often provide these files. By using the IES file to define your distribution, you can more accurately depict your light source. The geometry of the tagged light object has no relationship to the distribution of light. The definition of the light distribution comes from the photometry file alone.
Notes:
- Flamingo nXt supports Type C goniometry files, which includes the majority of IES files. Type A files, which are occasionally used by the automobile industry to define headlights, and Type B files, which are sometimes used to define floodlighting, are not supported.
- IES distributions include the effects of light fixture elements such as baffles, reflectors, and diffusers.
- IES distributions are often asymmetrical, so the process of aiming the source includes not just a target, but a rotation angle as well.
Brightness from file
Use the intensity stored in the IES file. If this is not checked, the Watts setting is used.
Additional Options Menu
Access additional options for lights by right-clicking on the light in the Light table.
On
Toggles the light On/Off.
Delete
Deletes the selected light.
Remove light tag
Removes the tag that makes an object a light.
Properties
Access the Light Properties for that light.
Select objects and matching items
Selects the light in the viewport.