Image Editor
The nXt Image Editor can edit native image files (.nXtImage) produced by any of the nXt platforms. These native files retain all of the information gathered during rendering. By using the nXt Image Editor, you can:
- Adjust the tone operator settings.
- Change the intensity of any lighting channel.
- Add special image-based effects: Haze, Depth Blur, and Glare.
- Save a tone-mapped image in a bitmap format such as .jpg or .png.
- Save the luminance information to an HDR format.
- View and save additional masked channels ( alpha, distance, material ) for use in advanced compositing.
- Save a Piranesi© file format (*.epx) which can be used to create non photorealistic rendering.
- Use Image Arithmetic for tasks such as stitching together an image that has been generated by separate nodes on the render farm.
- Save the Lighting Settings used to generate this rendering. These Lighting Settings can then be used to generate more renderings.
To launch the editor
On the Flamingo nXt 5.0 menu, click More Tools > Flamingo nXt Image Editor.
File menu
Open
Opens a file saved in nXtImage format for editing.
Save Source Image
Saves the nXtImage file.
Save Source Image As
Saves the nXtImage file under a different name.
Save Tonemapped Image As
Saves the edited image as a bitmap image file.
- JPEG (.jpg)
- TIFF (.tif)
- TIFF with Alpha Channel (.tif)
- PNG (.png)
- PNG with Alpha Channel (.png)
- Piranesi EPix file (.epx)
Piranesi is a 3-D painting tool that creates images with a hand-painted appearance.
Save HDR Image As
- HDR File (.hdr)
- EXR File (.exr)
- EXR with Alpha Channel (.exr)
Save Mask
nXtImage files contain three additional channels that can be used as masks for advanced compositing in most bitmap editors. These channels carry alpha, distance, and material information for each pixel, encoded in a gray-scale image. Each channel can be viewed and saved to a .png file.
Notes:
- The alpha channel can be included with a tone-mapped image by selecting a file format with Alpha when saving a tone-mapped image.
- Distance and Materials channels are not antialiased and may show some hard-edged artifacts. Adding a small amount of Gaussian blur to a mask before using it may help soften these edges.
- The Materials channel will only uniquely encode 255 different materials. If your model contains more materials than that, some mask colors will repeat.
Materials Channel
Saves the material channel mask.
Alpha Channel
Saves the alpha channel mask.
Distance Channel
Saves the distance channel mask.

Save Lighting Settings As
Saves the lighting scheme.
Image menu
Info
Displays information about the image.
Arithmetic
Allows piecing together or overlaying segments of images rendered using the Render Farm Single Image function.
To piece image segments:
- On the File menu, click Open.
- Select the first image of the sequence, for example, 000000.nXtImage.
- On the Image menu, click Arithmetic, and then click Add.
- Select all of the other images in the sequence.
Note: Do not select the first image (000000.nXtImage) again or it will be added twice.
Add
Adds pixel values of one layer to the other. When values are above 255 (in the case of RGB), white is displayed.
Subtract
Subtracts pixel values of one layer from the other. When values are negative, black is displayed.
Difference
Subtracts the top layer from the bottom layer or the other way round, to always get a positive value. Blending with black produces no change, as values for all colors are 0. Blending with white inverts the picture.
Masked Add
Takes the transparent alpha-channel mask into account when blending.
Combine Path Tracings
Combines images rendered using the Path Tracer engine so that, for example, when you combine ten images rendered with 20 passes each becomes the equivalent of an image rendered with 200 passes.
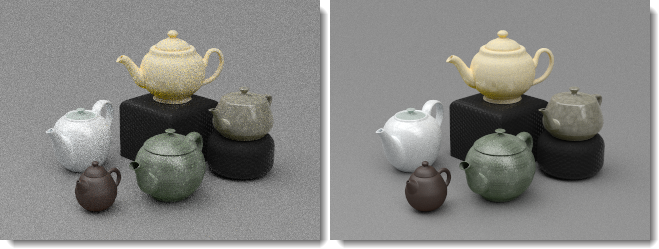 Rendered with 20 passes (left), ten 20-pass images combined to create a 200-pass image (right).
Apply Patch
Inserts an image rendered as a selected portion into the rendered image.
Animation
You can animate by changing the image information.
To animate image effects
- Set up the first image. Click the Plus (+) button next to the Frame edit box.
- Edit the image and add frames.
- Click Image > Animation, and in the dialog box, click Preview.
- If all is well, click Animate.
Create a folder.
A sequence of images will be created that can be used to create an animation using software designed for this purpose.
View menu
Specifies what to display in the image.
Image
Displays the original rendered image.
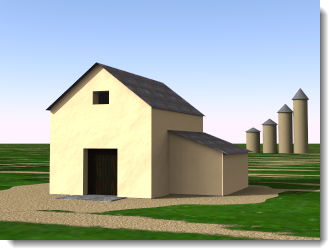
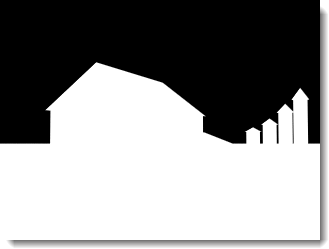
Image and Alpha Mask
Displays the image and the alpha channel mask together.
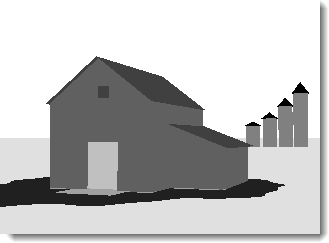
Material Mask
Displays the material mask.
Distance Mask
Displays the distance mask.
Using the image editor
Load an Image
- Save your rendering results as an .nXtImage.
- On the Flamingo nXt menu, click Utilities > Flamingo nXt Image Editor.
- In the nXt Image Editor, on the File menu, click Open to load the image into the editor.
Tone mapping
Tone mapping is the process of converting the luminance data used by nXt into RGB pixels that can be displayed or printed.
Brightness
See Render Window: Brightness. Note: In nXt, the overall brightness of a scene cannot be controlled by boosting the intensity of the light sources. The automatic exposure adjustment built into the tone-mapping process will defeat this. Adjust overall scene brightness by using the Brightness control.
Burn
See Render Window: Burn.
Saturation
See Render Window: Saturation.
Histogram
Status Fields
The status fields are located at the bottom of the screen. As you move your cursor over the image, these fields display information about each pixel.
Pixel
The pixel coordinate, measured from the lower left corner.
Color
The first three fields display the RGB colors displayed in the image after tonemapping. The fourth field shows the alpha (transparency) channel, which is used for compositing.
Value
The luminance value for each of the red, green, and blue sub-channels.
Lum
A weighted average of the luminance values stored in each pixel.
Depth
The distance of each pixel from the viewer in meters. Negative values indicate a background pixel.
Material
The name of the material used to render the pixel.
FX Settings
Special Effects can be added to an image. Many of these effects use the extra information the NXTimage format stores. For instance the glare uses luminance space working on actual light values and the haze uses distance in the image.
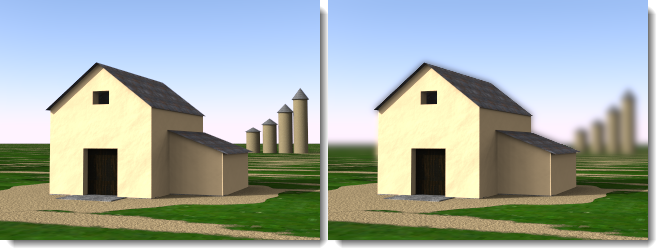
Haze
Adds color to pixels farther from the camera. This effect can be used to add a haze or fog effect to a scene or to mask a background with color or change the background color.
 Original image (left) and with haze (right).
Strength
Specifies the intensity of the haze color.
Near
The distance from the camera where haze will start adding color to each pixel.
Pick
Pick a point on the image to specify the distance.
Far
The distance where the haze effect is at its maximum. All pixels beyond this point have the maximum haze effect added to each pixel. Pixels between near and far have haze added in a linear fashion from the near to the far pixels.
Pick
Pick a point on the image to specify the distance.
Color
The haze color.
Pick
Pick a point on the image to specify the color.
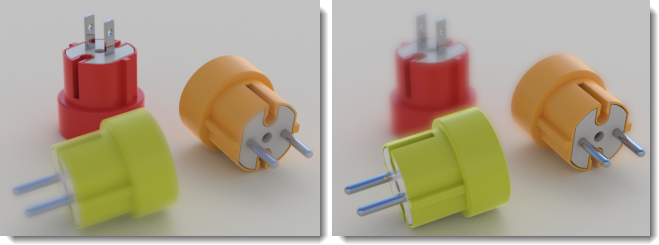
Depth Blur
Since each pixel in the image contains a distance value, this can be used to blur the image between specified distances.
 Original image (left) and with depth blur (right).
Strength
Specifies the amount of blur.
Focus
Specifies a distance in the image that will be in focus.
Pick
Pick a point on the image to specify the focus distance.
In-Focus Zone
The distance around the Focus that is sharp. This value is in meters. All pixels within this distance will be sharp and will be ignored by the Blur filter. Pixels beyond this distance will be progressively blurred with neighboring pixels to give the illusion of depth of field.
Blur
Controls which direction the blur filter will work. The default value is Background. This means all pixels farther away from the camera than the In-Focus Zone will progressively blur.
 Blur foreground (left) and background (right).
Background
Blurs pixels farther away from the camera than the In-Focus Zone range.
Foreground
Blurs pixels that are closer to the camera than the In-Focus Zone range.
Both
Blur pixels both in front and behind the In-Focus Zone range. This is a quick way to get a depth-of-field effect. It is not as accurate as using the built-in pre-render Depth of field.
Glare
Glare affects pixels that are brighter than the Threshold in lumens by creating a halo effect on the surrounding pixels. Only the brightest pixels in the image are affected. Hold the cursor over the pixels to see glare and read the total lumens of that pixel.
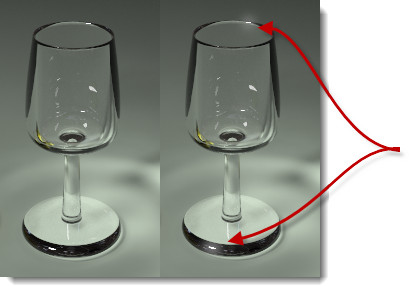 Original image (left) and with glare (right).
Strength
Adjusts the amount of halo that affects the surrounding pixels.
Threshold
The lower limit of the value affected by the glare filter. All pixels brighter than this value will be affected.
Pick
Pick a point on the image to specify the brightness value.
Vignette
Blurs and blends the colors on the edges of the image to create a halo effect.
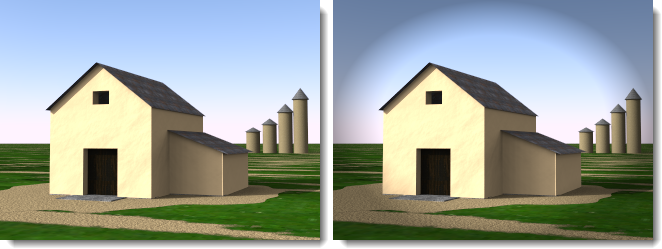 Original image (left) and with vignette (right).