Advanced Material Properties
Flamingo has both Simple Material Types and an Advanced Material type. The Advanced Material contains the complete series of property groups for a material. Use the Advanced Material type for the maximum flexibility and control of a material.
The complete set of property groups in the Advanced Material are:
- Name
- Material Procedure
- Advanced Material Properties
- Reflective Finish
- Transparency Properties
- Procedural Textures
- Bitmap Textures
- Notes
Material Name
This is the name of the material in the Rhino model. Materials are stored in the Rhino model. That means a material with the same name in the library or a different model will not be affected by edits to the material in the current model. To use any material in another model it must be exported to the Library first. The Name of the material will also serve as its exported file name.
Material Procedures
The Procedures tree combines one or more materials using a set of rules for how the materials interact. The tree displays the components used to create the material and lets you add components. For standard materials, there will be only one component in the list: Base.
Each procedure combines two “child” materials using a specific method. Each of these child materials can in turn consist of a procedure, combining two children of its own. In this way, extremely elaborate materials can be built from simpler constituents. Procedures for combining materials include Angular Blend, Blend, Marble, Granite, Tile, and Wood.
As an example, the Marble Procedure combines a Base material and Vein Material in a swirling pattern.
To add a procedure
- Right-click on Base the Procedures window.
- On the menu, click a procedure type.
To remove a procedure
- In the Procedures window,right-click the procedure name.
- On the menu, click Remove.
Advanced Material Properties
Color
Use the Color Selector to set the main color. See the Color Selector  topic for details.
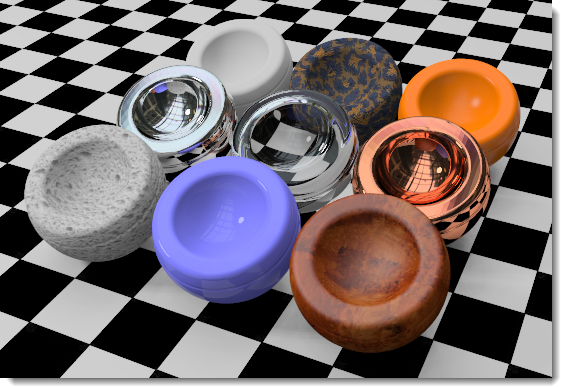
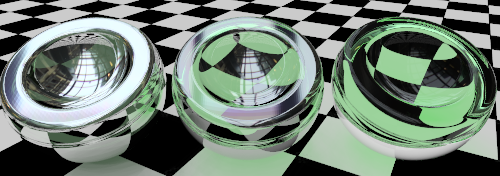
Reflective Finish and Highlight
These settings vary the way a material reflects light and objects. The highlight effect is normally associated with light areas on glossy materials where the light hits the object. The reflective effect is normally defined with mirror-like reflections that reflect the objects in the rest of the the scene. It is important to know that chrome and other reflective materials do not make an interesting image unless they have something to reflect. When working with reflective materials, also think about an interesting environment and other objects for the reflective materials to reflect. Note: To activate these settings, the Intensity value must be greater than zero.
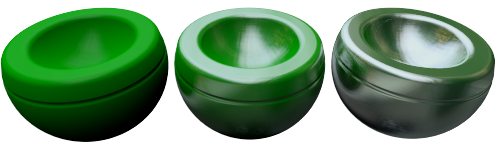
Highlight color
Highlight color is the color that material adds to reflections. There are three settings for this control: White, Metallic, and Custom.
White
Materials with a white highlight will not add any color to reflections. Materials with a white highlight are common and tend to resemble standard paint, plastics, or a mirror finish.
Metallic
Sets the highlight color to match the base color. Many metal finishes normally use the base color as the reflective color. This metallic option uses the material based color as a reflective color.
Custom
In some very specialized finishes, the reflection of the object will be a different color than the base color for the material. This is normally in materials that are actually made of multiple layers. Use Custom to specify any color for the highlight. Use the Color Selector to select a reflective color.
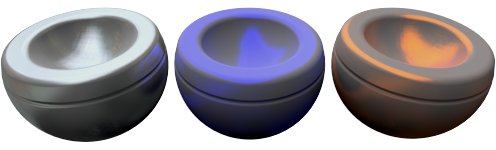
Intensity
Adjusts the highlight strength. Lower values tend to make glossy objects that reflect light, but not the surrounding objects. Larger values increase the size and strength of the highlight and reflections. The highest values will make the material mirror-like, reflecting other objects and the environment in the scene.
Fresnel
Pronounced (fray-NELL). Controls the reflectivity of opaque materials, a phenomenon known as Fresnel reflection of conductors. The Fresnel setting models the tendency of many materials to become more specular (mirror-like) at glancing angles while retaining more matte properties at perpendicular viewing angles.
Reduce the value for very dark materials to prevent too much reflection. Increase the value for materials like varnished wood, where the Fresnel reflectivity is more pronounced.
Sharpness
Sets the size of the highlight. Lower numbers specify a broader highlight; higher numbers focus the highlight in a smaller area. When applied to higher intensity reflectivity, it makes reflections blurry (out of focus) or sharp (in focus).
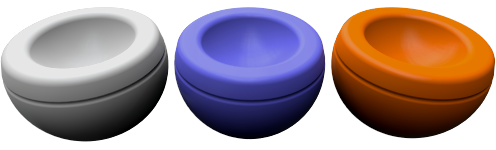
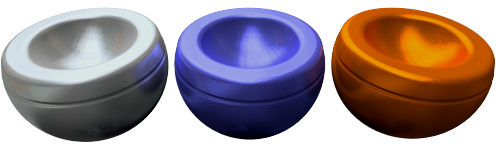
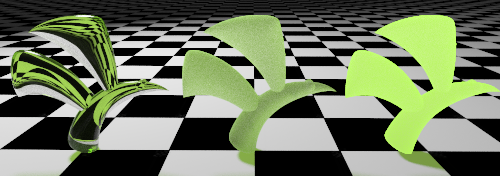
Type
Changes how reflections are calculated when artificial light sources are reflected. Reflections are calculated using two methods: raycasting and highlight. These two methods will eventually produce identical results; however, in certain situations, you will find that one method gets a good result more quickly. For example, objects might not look good because a light source reflection hides the material’s appearance.
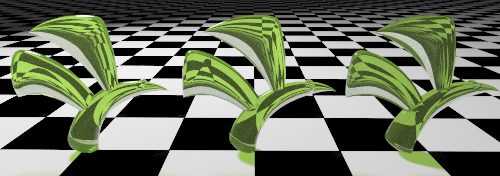
In the illustration below for Balanced type, the object on the left has a bright white reflection that overpowers the material’s appearance.
Sometimes interior renderings where the light sources are small can have a spotty artifact on surfaces. The surfaces exhibiting the artifact typically have blurry reflections. Changing the reflective type to Glossy, No Light Source Reflections, or Monte Carlo can help alleviate this problem.
Balanced
Automatically balances raycasting and highlight based on the Sharpness setting. Both the actual reflection of the light source and the artificial highlight are calculated.
Glossy
Increases the blurriness of the highlight and prevents raycasting. No object or light reflections are calculated. So performance is increased, and artifacts for materials with very blurry reflections are prevented. Some reflective subtlety may be lost.

Monte Carlo
Only raycasting is used to calculate reflections of light sources. The raycasting is initially very noisy and gradually converges to the correct solution. It is most useful when the highlight is not blurry.
No Highlight
Only raycasting is used to calculate reflections of light sources. This is useful when light sources are large and the material is not blurry; in which case, the highlight calculation can take a long time. The light source reflections gradually converge.
No Light Source Reflection or No Highlight
Excludes all reflections of artificial light sources and the artificial highlight effect. Object reflections are still calculated.

No Light Source Reflections
Excludes raycast reflections of light sources. Only the highlight is used. This is sometimes useful for preventing speckle artifacts if the material is blurry and the scene contains small, bright, light sources.
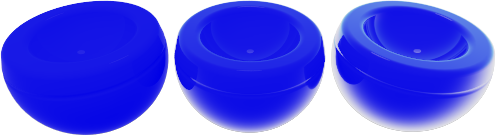
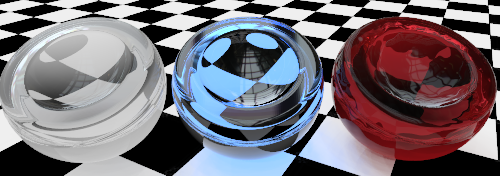
Transparency
The Transparency settings control properties associated with light passing through a material.
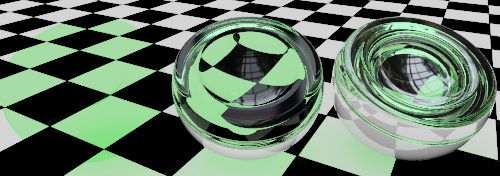
Transparency Intensity
Changes the material from opaque to transparent. Transparent materials increase rendering time.
Index of Refraction
Determines how much refraction occurs when looking through the material at objects beyond.
The following table shows some examples of index of refraction:
| Material | IOR | |
|---|---|---|
| Vacuum | 1.0 | |
| Air | 1.0029 | |
| Ice | 1.309 | |
| Water | 1.33 | |
| Glass | 1.52 to 1.8 | |
| Emerald | 1.57 | |
| Ruby/Sapphire | 1.77 | |
| Diamond | 2.417 |
Translucency
A measure of diffusion. High translucency produces a “sandblasted” effect, since more light is scattered randomly through the material. This is a very sensitive effect. Small adjustments can make a big difference.
Scattering
Controls the probability of the light encountering a particle per unit length. The Path Tracer is required for this effect.
Subsurface scattering permits light to penetrate the object’s surface and scatter in any direction. Many translucent materials can be modeled using this effect. Certain surfaces, such as stone or skin can be realistically “softened” by allowing the light to penetrate a short distance.
The material must have some transparency in order for sub-surface scattering to take place. This is a volumetric effect. The objects with this material attached must be solid or “space enclosing” for this to work properly.
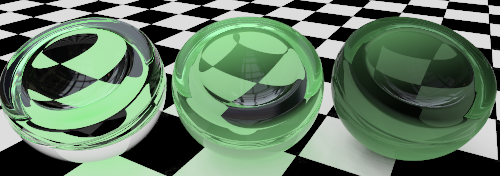
Attenuation
Determines how much light is absorbed as it passes through the object. Greater values produce a cloudier appearance. Use Attenuation to model liquids. Clear liquids have low Attenuation. Murky liquids have high Attenuation.
Dispersion
Controls how much light is split into its component wavelengths.
Saturation
Determines the amount of dispersion.

Blurry Transparency
When a material is partially transparent, a little noise is introduced into the transparency to make the material look more natural.
Blurriness
Controls the amount of noise added.
Glow
Creates the illusion of illumination.
Textures
Two types of textures can be added to a material: Image Textures and Bump Patterns. Image textures are based on bitmaps, photographs, or scanned images. Bump Patterns are random or repeating patterns generated by Flamingo.
Images
Use up to four bitmap images to add detail to a material. Image maps can be used many ways including the surface color and apparent three-dimensional surface quality. Image maps are two-dimensional patterns created using raster-based paint programs, by scanning photographs or other materials. A common method is to use a picture of a real-world material as the materials color. Images can consist of up to four images. Sometimes one image controls the color and another image may control the bump properties of the texture. To control how an image affects a material, go to the Image Properties Dialog.
To add a new image:
- Click on the (empty - Click to assign) text and then select an image in the file dialog.
- Or, click the Edit Image
 button and select an image in the file dialog.
To edit how an image effects a surface:
- Click on the name of the image in the list. This will present the Image Properties Dialog. To get back to the main material, click on the material name in the Material Editor
To replace an image with a different image:
- Click the Edit Image button and select an image in the file dialog.
Bump Patterns
Bump Patterns create the appearance of a specific kind of surface without using displacement maps or requiring additional maps. Bumps use mathematical rules to provide the illusion of surface bumpiness in the material. Patterns include:
Materials like stucco, concrete, and clay have a fine texture. It is probably not worth scanning a piece of the material to make a bitmap for it unless it will be viewed at close range. Using a Sandpaper procedural bump on a Base Color emulates this kind of fine pattern. Create a Base Color that is the color of the material. Then add a procedural bump to the material. Use Sandpaper for a fine texture and Rubble for a coarse texture.
When one of the bump maps is checked, more controls become available. More than one bump pattern can be added to a material.
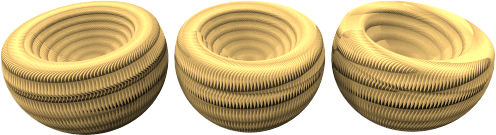
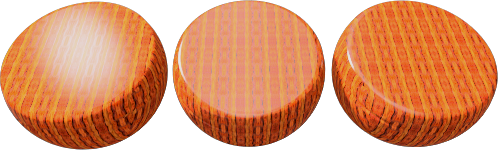
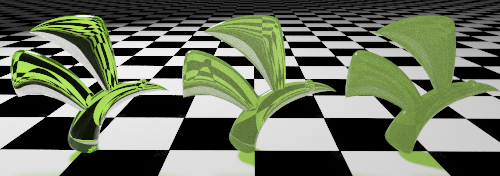
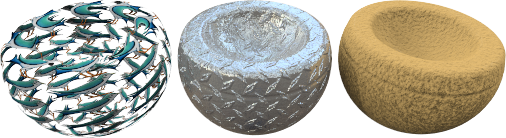
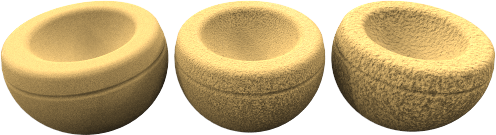
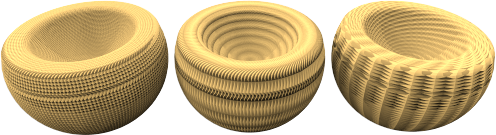
Sandpaper
Provides a random, finely textured appearance. Change the Scale, Strength, and Rotation to edit sandpaper.
 Sandpaper progressing from smaller to larger Scale and Strength.
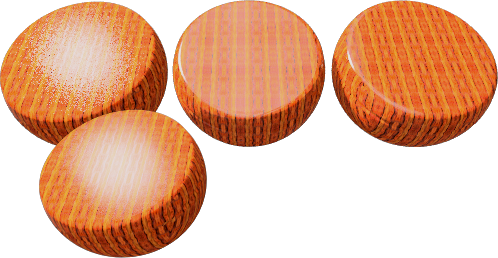
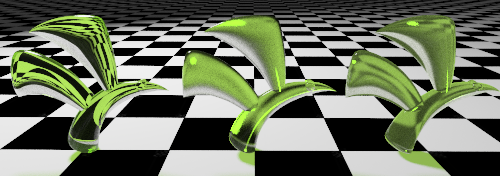
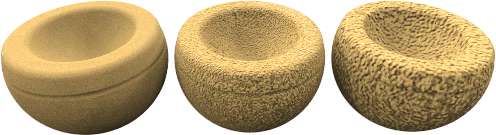
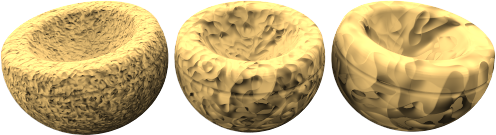
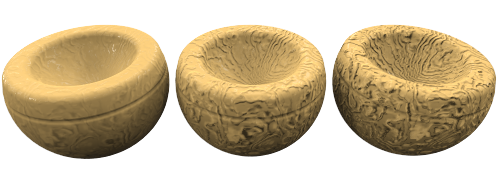
Rubble
Gives the appearance of a lumpy, pitted surface. It can be scaled up and used for water, dirt, and smudges on surfaces. Smudges can be made with a large Scale and a very small Strength using Rubble. Rubble bump has a larger size range than Sandpaper.
 Rubble progressing from smaller to larger Scale and Strength.
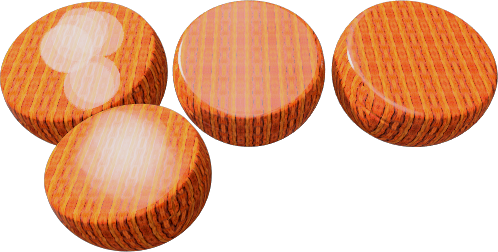
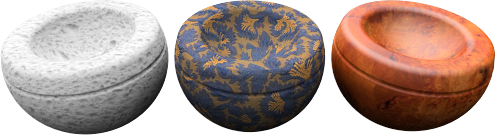
Pyramid
Gives the appearance of small pyramidal protrusions like a knurl pattern. Scale will control only the X and Y pyramid base size. Strength will effect the “height” effect of the pyramid.
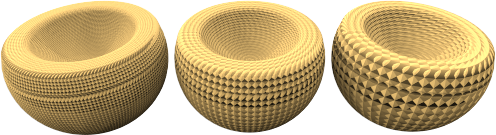 Pyramid showing a larger and larger Scale.
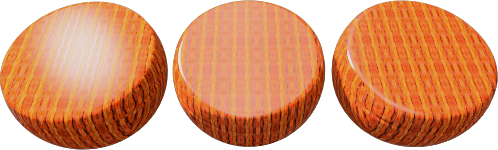
Wrinkled
Gives a wrinkled appearance. Change the Scale, Strength, and Rotation to edit wrinkled.
 Wrinkled showing a larger and larger Scale. Strength is held constant.
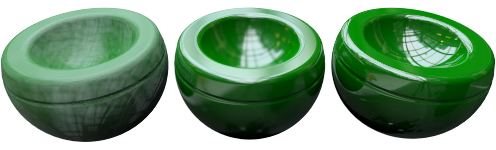
Marbled
Gives a marbled appearance. This is a swirling pattern. Change the Scale, Strength, and Rotation to edit marbled.
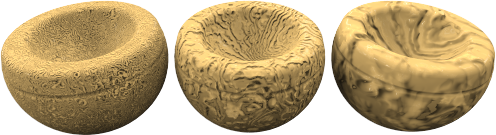 Marbled showing a larger and larger Scale. Strength is held constant.
Scale
Scale controls the proportional size of the bumps.
X/Y/Z
Specifies scale in each direction separately.
Lock
Maintains the aspect ratio.
Strength
Controls the appearance of depth.
Rotation
Sets the rotation angle for the pattern. Changes to the orientation are normally apparent only if the procedural map has an obvious pattern or if the bump map has been scaled with different x, y, and z components to produce a directional pattern.