Importing and exporting

Rhino supports many different import and export formats, making it possible to model in Rhino and then export your model to downstream processes, or import models from other software applications into Rhino. For a complete list of import and export file types refer to the Rhino Help > Contents > File I/O > File Formats.

Exporting Rhino File Information

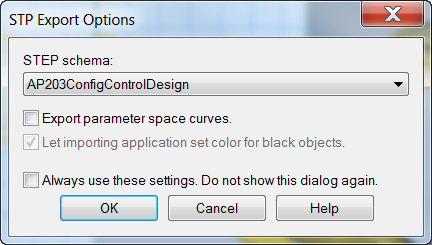
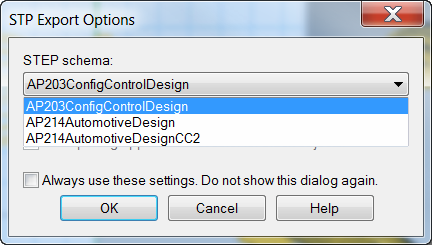
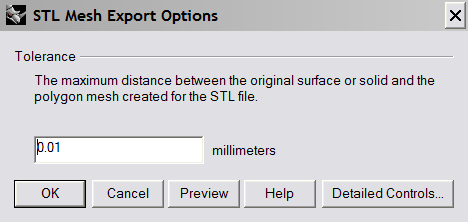
When you export to a format like 3DS, STL or DWG, Rhino has to convert from smooth NURBS surfaces to a polygon mesh representation made of triangles. To do a good approximation of the curved surfaces, Rhino can sometimes use many polygons. The density of triangles can be adjusted when exporting. You can create a mesh object and export it, or Rhino can create the mesh during the export process. There are two methods to export models to other formats. You can use the Save As command to choose a specific export format to export an entire model. Or, you can select some objects and use the Export Selected command to choose a specific export format to export a portion of the model. In the following exercise you will use the Save As method to export three of the most common file formats.

Importing other file formats into Rhino

We will not be importing any models in this class. Importing files from other applications is covered in our Level 2 Training course. If you have any specific questions about importing models into Rhino, consult your instructor.

Exercise 68—Exporting models

To export a model to a mesh format
  1. Open the model Export.3dm.
  2. From the File menu click Save As.
  3. In the Save dialog box, change the Save as type to Stereo lithography (*.stl).
  4. In the file name box type Export and click Save .images/export-01.png
  5. In the STL Mesh Export Options dialog box, set the Tolerance to 0.01, and click Preview.
  6. Set the Tolerance to 0.1, click Preview, and then click OK.
  7. In the STL Export Options dialog box, select Binary, check Export open objects, and click OK .Detailed mesh controls are discussed in more depth in the Level 2 training class.images/export-02.pngimages/export-03.png
To export a model to IGES
  1. From the File menu click Save As.
  2. In the Save dialog box, change the Save as type to IGES (*.igs).
  3. In the IGES Export Options dialog box, select Pro E Windows solids as the IGES type, click Detailed Controls .Detailed controls allow the user more input.
  4. Click Cancel to terminate, or OK to create the IGES file.images/iges-export.png
To export a model to STEP
  1. From the File menu click Save As.
  2. In the Save dialog box, change the Save as type to STEP (*.stp, *.step).
  3. In the STEP Options dialog box, use the default setting.images/stp-export.pngimages/stp-export2.png