Studio Lighting Basics
Studio lighting must be set up similar to a photographer’s studio. For greater control, use light sources to light the scene.
 When lighting a studio setup, dramatic lighting is important. Create dramatic lighting by producing a lot of contrast. This means that dark areas are just as important as light areas. Dramatic lighting requires a number of light sources placed in a way to create very light and very dark areas.
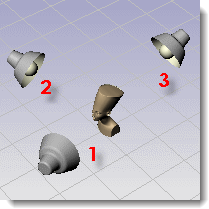
The most basic studio lighting arrangement uses a key light (1), a fill light (2), and a back light (3). This is the most common lighting arrangement for standalone characters and objects in the studio. A three-point setup will give good results right away and is an excellent starting point for creating special effects. Spotlights are useful because you can control their direction and hot spot to give the scene drama.
When lighting a studio setup, dramatic lighting is important. Create dramatic lighting by producing a lot of contrast. This means that dark areas are just as important as light areas. Dramatic lighting requires a number of light sources placed in a way to create very light and very dark areas.
The most basic studio lighting arrangement uses a key light (1), a fill light (2), and a back light (3). This is the most common lighting arrangement for standalone characters and objects in the studio. A three-point setup will give good results right away and is an excellent starting point for creating special effects. Spotlights are useful because you can control their direction and hot spot to give the scene drama.
Camera Angle
Lighting setups always depend on the angle of the camera to the subject. It is a good idea to start lighting by deciding on the camera angle. Use the Camera or NamedView commands to set up the position and angle of the camera. This will help determine the position of the lights.
Basic Three-Light Setup
A basic studio lighting setup includes three lights, a key light, a fill light, and a backlight.
Key Light
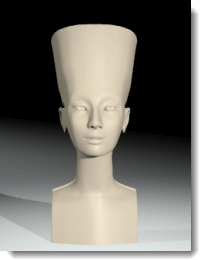
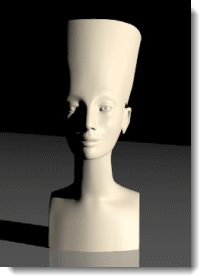
The key light is the dominant light in the scene. It sets the mood, provides direction, shows dimension and texture, and creates the darkest shadows. A key light is usually set 30 to 45 degrees to the side of and above the object depending on the subject matter.
The closer the key light is to the camera, the less modeling and texture it produces. A key light is usually higher than the lens, and throws shadows down. As the key light moves to the side, the three-dimensional quality of the object increases. In a classic portraiture setup, the key light is set at about a 45-degree angle between the subject and the camera and high enough to throw shadows down, but not so high that the subject’s eyes are in shadow.
If the key light is a soft light, little or no fill may be required. It is a basic solution for lighting small studio setups as well.
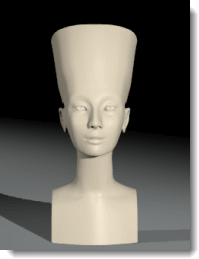
The shadow cast by the key light will be visible on the subject. In images of faces, this often shows up as a strong shadow cast by the nose.
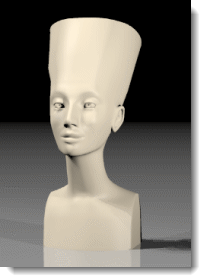
Fill Light
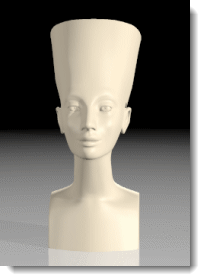
The fill light is placed just above the lens on the opposite side from the key light. Its purpose is to reduce contrast and bring out detail in the shadows by simulating light reflected off nearby objects. The key light and fill light may be of equal intensity for a low-contrast result, but the key light is usually brighter and harder than the fill light. The fill light is the secondary light in the scene. It should not introduce any more dark shadows into the scene.
In the illustration, notice that the shadow to the left of the nose and along the left side is lighter and softer than the image with the key light alone.
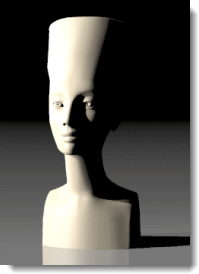
Backlight
The backlight effect is subtle but can define the edges of objects in the scene and add depth by preventing objects from blending into the background. Backlights are usually placed behind and above the object and are pointed toward the camera.
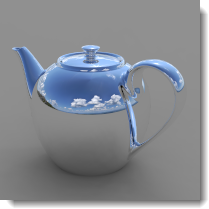
The effectiveness of backlights depends in part on the reflectivity of the surfaces they are lighting.
In the illustration, the light on the top of the shoulders helps separate the subject from the background. The backlight also softens the shadows and brightens the surface the object is sitting on.
Light Qualities
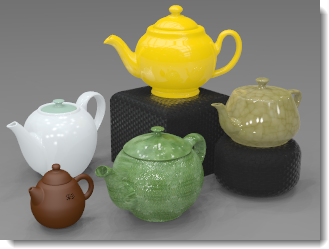
Images can be created with accurate shadows, highlights, and reflections, but without proper lighting, the goal of the shot will be missed. When setting up the lighting, consider the goal. Images work well if they are bold, graphic, and simple. Too many highlights in glassware or shadows from objects may add unnecessary complexity to a scene and detract from its essence. Some of the qualities to consider include:
The contrast range of the scene The depth of the scene (its three-dimensional quality) Separation of objects from the background Whether the lighting should be hard of soft Whether the lighting should be warm or cool in color
Contrast Range
Contrast range is the difference between the brightest and the darkest areas with detail in a given scene. The human eye is capable of dealing with a far greater contrast range than film and can locally compensate to see detail in the extreme areas. This effect can be seen in snapshots taken on a sunny day.
Typically, the highlight side is too bright or the shadow side is too dark, yet you had no trouble seeing detail in both the dark and light areas. The contrast range is just too great for the film to record. This is also true of rendered images, as there is a limit to the colors the computer can display.
 A lower contrast image prevents details from being obscured in the highlight or shadow areas.
Three-Dimensional Quality
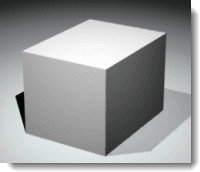
Representing three dimensions in a two-dimensional space requires an illusion of depth. An opaque object lit from the side implies depth because there is a bright highlight side and a darker shadow side. A box showing three sides will have more dimension if each side is a different value. Often the top plane will be the brightest because light usually comes from above in real life situations.
Separation from the Background
For a product to pop off the page, in addition to a three-dimensional quality and using the full contrast range, there must be good separation. That is, the edges of our subject must be decidedly lighter or darker than the background. Without separation, the subject blends into the background.
In the illustration, the highlight at the top of the object helps separate it from the background
The subject’s shadow can sometimes aid separation and sometimes cause objects to merge with the background. A backlight can facilitate separation by creating a bright edge around the subject.
Hard or Soft Light
One way to categorize light is hard (direct) or soft (diffused).
A hard light casts a clearly defined hard-edged shadow.
 Diffused light casts a soft, sometimes indistinguishable shadow.
Diffused light often produces a more attractive image than hard light because of its soft shadows. The larger the light and the closer it is to the subject, the softer it is. A large soft light can simulate light from a window.
Diffused light casts a soft, sometimes indistinguishable shadow.
Diffused light often produces a more attractive image than hard light because of its soft shadows. The larger the light and the closer it is to the subject, the softer it is. A large soft light can simulate light from a window.
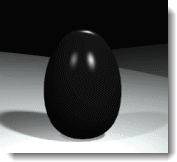
 Diffuse lighting can work well for dark plastic objects, because it produces a broad highlight that helps define the shape of black shiny objects.
 When lighting a studio setup, dramatic, high contrast lighting is important. This means that dark areas are just as important as light areas. Dramatic lighting requires a number of lights placed in a way to create light and dark areas.
Lighting techniques for photography are generally the same as lighting for rendering, so a good place to start learning is one of the many books on the subject of photographic lighting.
Flamingo nXt includes pre-set lighting schemes to help you get started lighting your model. The settings on the Advanced tab are optimized for each lighting method.
When lighting a studio setup, dramatic, high contrast lighting is important. This means that dark areas are just as important as light areas. Dramatic lighting requires a number of lights placed in a way to create light and dark areas.
Lighting techniques for photography are generally the same as lighting for rendering, so a good place to start learning is one of the many books on the subject of photographic lighting.
Flamingo nXt includes pre-set lighting schemes to help you get started lighting your model. The settings on the Advanced tab are optimized for each lighting method.