 材质贴图属性
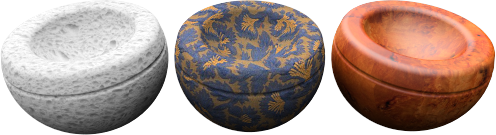
材质使用的贴图可以从照片或真实的材质(例如:壁纸或毡子)扫描得到,也可以是绘图软件创建的图片或其他各种来源的图片。
材质可以在空间的四个方向重复出现无限延伸,但只有一部分会出现在物件上。
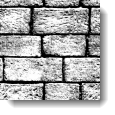
细碎纹理的图片通常比较可以拼贴排列而没有明显的接缝,如果图片拼贴有明显的接缝使纹理看起来不连续,可以使用镜像拼贴选项。
附注: 如果您不想让图片在物件上重复出现(例如:酒瓶瓶身上的标签或某个产品上的商标),请改用印花功能来做这样的贴图。
图片贴图有很多种用法,常见的用法是以真实世界的材质照片作为材质的颜色贴图。
名称
图像贴图可以命名,名称仅用于 RDK 中的贴图库,对 Flamingo 没有实际影响。
Flamingo 图片
图片预览
显示选取图片文件的预览,鼠标停留在图片上将弹出图片的文件名,点击图片可以选取另一张图片。
图片分辨率
显示当前图片文件的分辨率。
拼贴
材质使用的贴图一定会重复拼贴,这里的设置是指拼贴中的一个单位的尺寸(模型单位)。
宽度/高度
以模型单位设置图片的宽度与高度。
Lock
Maintains the ratio between the Width and Height.
Masking
Obscures portions of the image based on either a color value or an alpha channel stored in the image. This allows textures to have complex shaped boundaries and create complex effects such as holes in a surface.
In this example, an image with an alpha-channel background is placed as a decal on a rectangular surface. Masking for materials works the same..

 Original decal image. The gray checkered area represents the image alpha channel.
Masking information can come from three sources in the bitmap:
None
With no masking, the image obscures the underlying material. Masking allows the material to show through the image where the alpha channel or masking color exists. The material assigned to a planar surface in this example has a red base color
 Without masking (left) the image covers the surface, with masking (right), the red material shows through.
Alpha Channel
Uses the image’s alpha channel to define the masked area if one exists.
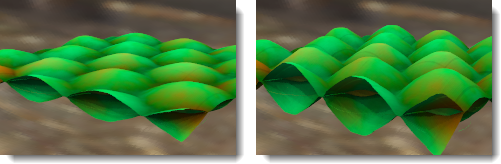
Original on the left. The gray checkered area represents the image alpha channel. On the right is the image over a water surface.
The alpha channel is a portion of each pixel’s data that is reserved for transparency information. Alpha channels create and store masks that let you isolate and protect parts of an image while you apply color changes, filters, or other effects to the rest of the image. Each pixel in an image is described as channels of data that define the mixture of the red, green, and blue (RGB) colors. The alpha channel is an 8-bit (256-level) grayscale representation of the image that masks the color of the underlying pixel. The value of the alpha mask determines the intensity of the pixel color. If the Alpha channel is 100%, the images pixel will be complete transparent. At other alpha strengths. the image pixels will blended with transparency.
Color
If alpha channel does not exist in an image, a color in the image can be specified as a mask. There is also a sensitivity number to make the mask more or less sensitivity to a single specific color as a masked color. Selecting the Color option will activate the Color Dropper, Color Selector and Sensitivity controls.
Color Dropper
Click to select the mask color from the bitmap. Click on the Color Dropper, then on the bitmap to pick the color. This control is only available when the Color option is selected.
Color
Use the Color Selector to set the main color. See the Color Selector  topic for details.
Sensitivity
The value indicates the size of the area around the color that is also masked. Must be greater than 0.0 for color masking to occur. This control is only available when the Color option is selected.
Blur
Partially masks pixels. The value determines the magnitude of partial masking around the masked color. This control is only available when the Color option is selected.
Reverse
Inverts the mask—pixels that would have been masked are now included, and vice versa.

Transparent
Makes the masked area of the underlying object transparent so other objects or the background behind the object can be seen through the object. Normally, the material of the object shows through in that area. Transparent masking allows a more natural shadow and allows the background objects to show. The underlying material could simply be transparent, but sometimes it is useful to make the surface behind the decal transparent while keeping other areas of the surface opaque.

Show masked colors
Graphically displays the effects of masking as the parameters change. Use the Color Selector provided to select the display color of the masked pixels. Changing this color or the setting of the checkbox does not change the masked color. This is simply a graphical tool for editing the mask.

贴图类型
图片通常都应用在颜色通道上作为贴图,但是图片也可以用于以下用途:
标准
以图片取代材质的颜色,也可以在材质上产生视觉上的凹凸效果。强度和凹凸的值决定了图片如何影响材质。
颜色强度
设置贴图的透明度,以这个例子而言,材质的底色是洋红色,颜色的数值越高,材质的底色透出贴图的量就越少,数值为1.0时,底色完全被贴图遮住。
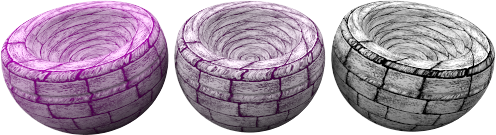 颜色强度 0.2、0.5、1.0。
凹凸
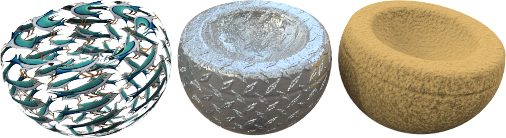
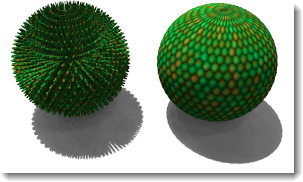
以贴图的颜色在物件上产生视觉的凹凸效果。下图左边的球体是使用置换贴图,因为物件表面真的变化,所以它的阴影边缘也变得不平滑。右边的球体是使用凹凸效果,物件并未真的变形,所以它的阴影边缘并没有改变,还是非常平滑。请参考:维基百科: 凹凸贴图。
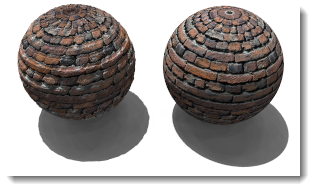 凹凸强度, 0.5 (左) 与 1.0 (右)。
法线向量
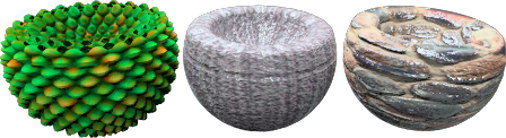
法线向量贴图可以使低网格面数的模型有高网格面数的细节。请参考:维基百科: 法线贴图。
法线向量贴图与凹凸贴图类似,这两种贴图都是以改变渲染网格的法线方向增加物件的渲染细节。不同在于:凹凸贴图只是使用图片的灰阶值,所以凹凸效果只有单一方向(法线)的变化;法线向量贴图是以 RGB 代表 XYZ 三个方向,比起凹凸贴图更能表现物件形状变化的丰富细节。
置换
细分物件网格,对物件网格做真实的凹凸变化,不像凹凸贴图只是视觉上的效果。请参考:维基百科: 置换贴图。
附注:置换贴图会使渲染网格的数目以倍数增加,请小心使用,以免造成内存不足。
高度
变形距离的最大限制。
偏移
设置置换贴图在曲面法线反向上偏移的百分比,置换可以完全位于曲面外或曲面内,也可以一部分在内一部分在外。
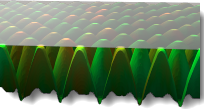 Z 偏移 = -1.0
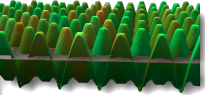 Z 偏移 = -0.5
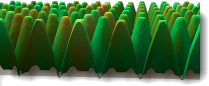 Z 偏移 = 0.0
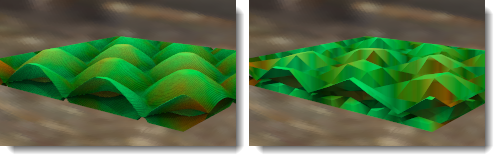
细分面大小
置换贴图网格面的大小。这可以增加置换的细节,但同时也会增加渲染时间和内存占用。
Flamingo 高级贴图
Flamingo 通常都是将图片应用在颜色通道上作为贴图,在 Flamingo 高级编辑器中可以使用贴图制作一些其他效果。
基本颜色
这是默认设置,图片可以作为材质的颜色。
反光颜色
将会使用贴图控制反射通道的颜色。
反光强度
图片各个位置的灰度值将更改材质上对应位置的反射总量。此项常常用在贴图组中作为反光贴图。
高光锐利度
图片各个位置的灰度值将更改材质上对应位置高光的锐利度与模糊度。
高光形状
影响高光的形状。
透明度
图片各个位置的灰度值将更改材质上对应位置的透明度。
半透明
图片各个位置的灰度值将更改材质上对应位置的半透明。
衰减
图片各个位置的灰度值将更改材质上对应位置的衰减。
偏移 X/Y
材质在 X/Y 方向的偏移量。
旋转
设置图像贴图的旋转角度。例如贴图在物件上方向不对,可以使用 90 或 180 度将图像转正。